Thursday, June 30, 2011

Strawberry Chocolate Tart


Memorial Day.

Requires a spectacular dessert. Ideally, to go with a spectacular BBQ.

Short of making two desserts, what do you do when two adults require chocolate in the dessert, and two adults require chocolate-less dessert?

You make this:

Slightly burned crust, not a great picture, but you need to see the whole thing.
And someday soon I will have a real tart pan.


A strawberry chocolate tart, with chocolate on only half of the tart.

Brilliant, no?

You may think that the ganache drizzle is not enough chocolate. But there is a secret layer of ganache between the crust and the tart filling.

Awesome indeed.

Strawberry Chocolate Tart


Ingredients:


For the crust:
1 large egg yolk
1 TB heavy cream
1/2 tsp vanilla extract
1 1/4 cups all-purpose flour
2/3 cup powdered sugar
1/4 tsp salt
8 TB cold unsalted butter, cut into ½-inch cubes

For the ganache:
2 oz. bittersweet chocolate, finely chopped
1/4 cup heavy cream
1 TB unsalted butter, at room temperature

For the filling:
8 oz. cream cheese, softened
1/2 cup powdered sugar
1/2 tsp vanilla extract
2 TB milk or cream

For topping:
Fresh strawberries, sliced
Melted bittersweet or semisweet chocolate, for drizzling (optional...but not really)


Directions:

To make the tart crust:
Whisk together the egg yolk, cream and vanilla in a small bowl and set aside.

Place the flour, sugar, and salt in a food processor. Process briefly to combine.

Scatter the butter pieces over the flour mixture and process to cut the butter into the flour until the mixture resembles coarse meal, about fifteen 1-second pulses.

With the machine running, add the egg mixture and process until the dough just comes together, about 12 seconds.

Turn the dough onto a sheet of plastic wrap and press into a 6-inch disc. Wrap in plastic wrap and refrigerate at least 1 hour or up to 48 hours.

Remove the dough from the refrigerator. (If refrigerated for more than an hour, let stand at room temperature until malleable.) Unwrap and roll the dough out on a lightly floured surface to a 13-inch round.

Transfer the dough to a 9-inch tart pan. (You can use a pie pan if you must, and I must). Mold the dough to the sides of the tart pan and remove the excess off the top. Set the dough-lined tart pan on a large plate and freeze for 30 minutes.

Meanwhile, adjust an oven rack to middle position. Preheat the oven to 375° F.

Set the dough-lined tart pan on a baking sheet, press a 12-inch square of foil into the frozen shell and over the edge, and fill with pie weights.

Bake for 30 minutes, rotating halfway through the baking time.

Remove from the oven and carefully remove the foil and weights. Continue to bake until deep golden brown, 5-8 minutes longer.

Transfer to a wire rack to cool.

To make the ganache:
Place the chocolate in a heatproof bowl.

Bring the cream to a simmer in a small saucepan.

Remove from the heat and pour over the chocolate. Let sit 3 minutes to melt the chocolate.

Whisk together until a smooth ganache forms. If there are still bits of unmelted chocolate, microwave in 10 second intervals, whisking in between, until the ganache is completely smooth.

Whisk in the butter.

Spread the ganache in a thin even layer over the bottom of the cooled tart shell. Place the pan in the fridge or freezer and allow the ganache to set up.

To make the filling:
Beat together the cream cheese and powdered sugar in a bowl on medium-high speed until smooth. Blend in the vanilla and milk or cream. Spread the cream cheese mixture over the cooled ganache in the tart shell.

Adding the strawberries:
Starting from the outside and working toward the center, place the sliced strawberries in concentric circles slightly overlapping each other. Gently press the berries into the cream cheese mixture to help keep them in place. Drizzle with melted chocolate, if desired. Chill until ready to serve.


Adapted from Annie's Eats:
Strawberry Cream Cheese Tart

Wednesday, June 29, 2011

Kitty

We need a few more Kitty pictures around here.


I love this girl.


And my goodness, we love summer.

Tuesday, June 28, 2011

Chocolate Raspberry Cake

BEHOLD!

The best cake ever.
Three layers of chocolate cake.

With raspberry ganache filling.

Raspberry buttercream frosting.

KEEP BEHOLDING!

And...dark chocolate glaze.

This cake was so fun to make. Labor intensive, yes. But oh, so fun.

And just in case you think raspberry truffles would have looked perfect atop this gorgeous cake, you would be right. But on this particular week, no raspberries were to be found in all of southside Indianapolis.

THE CAKE

Ingredients:
1½ cups unsweetened cocoa powder
1½ cups boiling water
¾ cup sour cream (or plain yogurt)
1 TB vanilla extract
3 sticks unsalted butter, at room temperature
2½ cups plus 2 TB sugar
3 large eggs
1¾ cups plus 2 TB all-purpose flour
1¼ tsp baking soda
¾ tsp salt

Directions:

Combine the cocoa and boiling water and whisk together until smooth. Let cool slightly. Whisk in the sour cream.

In the bowl of an electric mixer, combine the butter and sugar. Beat together on medium-high speed until light and fluffy, about 5 minutes. Blend in the eggs one at a time, scraping down the bowl as needed. Beat in the vanilla. Combine the flour, baking soda and salt in a small bowl; stir together to combine. With the mixer on low speed, add the dry ingredients to the mixing bowl in three additions, alternating with the cocoa-sour cream mixture, beginning and ending with the dry ingredients. Beat each addition just until incorporated.

Grease and dust the edges of three 9-inch round cake pans with butter and cocoa powder. Line the bottoms with rounds of parchment paper.

Divide the batter between the prepared baking pans. Bake 30-35 minutes in a preheated 350 degree oven, or until a toothpick inserted in the center comes out clean. Let cool in the pans about 15 minutes, then transfer the cakes to a wire rack to cool completely.

THE FILLING


Ingredients:
1 cup bittersweet chocolate chips (semi-sweet is fine too)
1/2 cup seedless raspberry jam
1/2 cup heavy cream

Directions:
Place chocolate and jam in a glass bowl.

Heat the cream in a small saucepan to boiling, then pour over chocolate/jam mixture.

Let it sit for about 3 minutes, then stir until smooth.

If ganache is still lumpy, pop it in the microwave for 15 seconds and give it another stir. Continue to heat and stir until the ganache is nice and smooth.

Put 1/2 cup or so of the ganache in a piping bag and put it in the fridge for about 10 minutes. You want this part to be more firm than the rest.

Let the rest of it sit for 10 minutes or so at room temperature til it has thickened a bit.

THE FROSTING

Ingredients:
16 tbsp. unsalted butter, at room temperature
6 cups powdered sugar
1/2 cup seedless raspberry jam

Directions:
Place the butter and jam in the bowl of a stand mixer fitted with the paddle attachment. Cream on medium-high speed until well incorporated, about 2 minutes. Sift in the powdered sugar and mix until smooth.

THE GLAZE

Ingredients:
4 oz. bittersweet chocolate, finely chopped
½ cup heavy whipping cream
¼ cup light corn syrup
2 tsp. vanilla extract

Directions:
Place chocolate in a glass bowl.

Heat the cream in a small saucepan to boiling, then pour over chocolate.

Let it sit for about 3 minutes, then stir until smooth.

Add corn syrup and vanilla extract.


PUT IT TOGETHER

Bake and cool the three layers of cake. Place first cake on a cake stand (be sure you peel off the parchment paper). Tuck strips of parchment paper between the cake and cake stand to catch any frosting/glaze drips.

Pipe a border of ganache around the edge of the cake. This will keep the rest of the ganache from leaking out when you add the next cake layer.

Spread 1/2 of the ganache within the piped border.

Gently add the second layer of cake. Pipe another border of ganache around the edge and spread the remainder of the ganache within the piped border.

Add the last layer of cake.

Put the cake in the fridge (or freezer) while you make the frosting. The ganache filling will firm up more quickly so your cake layers don't slide around while you are trying to frost it.

Now frost the cake with that beautiful pink raspberry buttercream frosting.

Put the cake back in the fridge while you make the glaze.

Now pour the glaze over the top of the cake, allowing some to drip artistically down the sides. It's harder than it looks to make it look pretty. I did not succeed, better luck next time.

You should have some ganache left in the piping bag. You can use that to make some pretty swirls on the top of the cake.

And if you can find raspberries, they would look awesome on top of the cake.

Now enjoy all your hard work. The best cake you'll ever make. Maybe the prettiest too.

Monday, June 27, 2011

Vanilla Pastry Tart with Fresh Fruit

I made a cake for my sister-in-law the week before Kitty's birthday. It was gorgeous and delicious and I can't wait to blog about it. But then I was caked out. So I decided to make a tart for Kitty's birthday 'cake'. She's crazy about raspberries and blueberries, so I thought she would love it.

I made this once before and the pastry cream didn't set up quite right. So I was so relieved when everything worked out perfectly. Except that it got eaten up too fast.

As I was photographing the tart, I realized it would make a perfect Fourth of July dessert. We may have it again this weekend.


Vanilla Pastry Tart with Berries

Ingredients:

For the tart dough:
1 large egg yolk
1 TB heavy cream
1/2 tsp vanilla extract
1 1/4 cups all-purpose flour
2/3 cup powdered sugar
1/4 tsp salt
8 TB cold unsalted butter, cut into 1/2-inch cubes

For the pastry cream:
2 cups half-and-half
1/2 cup sugar
Pinch salt
5 large egg yolks
3 TB cornstarch
4 TB cold unsalted butter, cut into 4 pieces
1 1/2 tsp vanilla extract

For the topping:
Fresh raspberries
Fresh blueberries

Directions:

To make the pastry cream:

Heat the half-and-half, 6 tablespoons of the sugar, and the salt in a saucepan over medium-high heat until simmering, stirring occasionally to dissolve the sugar.

Meanwhile, combine the egg yolks and remaining 2 tablespoons sugar in a medium bowl and whisk until the sugar has begun to dissolve and the mixture is creamy, about 15 seconds. Whisk in the cornstarch until combined and the mixture is pale yellow and thick, about 30 seconds.

When the half-and-half mixture has reached a simmer, slowly add it to the egg yolk mixture to temper, whisking constantly. Return the mixture to the saucepan, scraping the bowl with a rubber spatula.

Bring the mixture to a simmer over medium heat, whisking constantly, until a few bubbles burst on the surface and the mixture is thickened and glossy (the original recipe said this takes 30 seconds...it took me 90 seconds).

Remove pan from heat and whisk in the butter and vanilla.

Strain the pastry cream through a fine mesh sieve set over a medium bowl. Press plastic wrap directly on the surface to prevent a skin from forming and refrigerate until cold and set. (At least 3 hours and up to 2 days.)

To make the tart shell:

Whisk together the egg yolk, cream and vanilla in a small bowl and set aside.

Place the flour, sugar, and salt in a food processor. Process briefly to combine.

Scatter the butter pieces over the flour mixture; process to cut the butter into the flour until the mixture resembles coarse meal, about fifteen 1-second pulses.

With the machine running, add the egg mixture and process until the dough just comes together, about 12 seconds.

Turn the dough onto a sheet of plastic wrap and press into a 6-inch dish. Wrap in plastic wrap and refrigerate at least 1 hour or up to 48 hours.

Remove the dough from the refrigerator. (If refrigerated for more than an hour, let stand at room temperature until malleable.) Unwrap and roll the dough out on a lightly floured surface to a 13-inch round.

Transfer the dough to a 9-inch tart pan. Mold the dough to the sides of the tart pan and remove the excess off the top.

Set the dough-lined tart pan on a large plate and freeze for 30 minutes.

Meanwhile, preheat the oven to 375° F. Set the dough-lined tart pan on a baking sheet, press a 12-inch square of foil into the frozen shell and over the edge, and fill with pie weights.

Bake for 30 minutes (on center rack), rotating halfway through the baking time.

Remove from the oven and carefully remove the foil and weights.

Continue to bake until deep golden brown, 5-8 minutes longer. Transfer to a wire rack to cool.

To assemble the tart:

Spread the cold pastry cream evenly over the bottom of the tart shell. Arrange the fruit on top of the pastry cream as desired.

*Recipe adapted from Annie's Eats*

Sunday, June 26, 2011

Happy Birthday, Kitty

Here we are, already at the end of the crazy and fun month of June. We celebrated Kitty's second birthday this month.

We played at a splash park...
...and had Chocolate Cheerios for breakfast.

She loved opening her gifts.
Her new puzzle was a hit (as was the sidewalk chalk that you can see on her shirt)...

...and she was a huge fan of the pillow pet from Grandma. She grabbed a blanket and snuggled right down.
She loved the 'cake' (fruit tart with vanilla pastry cream...um, I loved it too). She squealed when she saw it and grabbed a raspberry.
I must say that she has risen to the occasion of being two. She insists on doing everything herself. She pats her chest and shouts, "My! My!", meaning of course, "I'll take care of this myself, thanks."

She has ditched her little potty seat and sits on the potty like everyone else. I'm quite impressed with her balance. Occasionally she falls in, but she just says, "Uh!" and pulls herself out with a giggle.

She loves to tell Boo to "shhhh", which dissolves Boo into tears every time. She adores Hide and Seek, Duck, Duck, Goose, puzzles, counting, and letters. Dogs still rank up at the top of the list of things she loves, followed closely by bears and her books.

Happy Birthday, Kitty!

Wednesday, May 25, 2011

Granola Bars

This is my 500th post!
So we're celebrating with granola bars.

I know. We're wild and crazy.

The girls and I love granola bars. But I haven't had much luck making my own. I've tried a variety of recipes in which the granola bars are baked, but with no success. Crumbly, dry messes.

Then along came Judicial Peach's no bake granola bar recipe. It took a few tries to get it the way I liked it, but now they are a staple in the house.

The ratio to remember is about 3 cups of dry ingredients to 1 cup gluey ingredients. I tried the peanut butter/honey combo for glue initially and it is quite tasty. But I'm now addicted to almond butter/honey. I'm in some serious love with almond butter. It might deserve its own post.

If you've never made your own granola, try my recipe. It's awesome. If I do say so myself.


Granola Bars

4 cups granola (without the dried fruit added at the end)
1 cup raisins
3/4 cup chocolate chips
1/4 tsp Kosher salt
1 1/4 cups natural almond butter (or peanut butter)**
3/4 cup honey

Put the chocolate chips in the freezer for a few minutes. (This will prevent melting later...although they certainly aren't bad with the chocolate melted throughout).

Mix the granola, raisins and salt.

Mix the almond butter and honey together in a small pan over low heat until melted and smooth. This doesn't take long, 3-4 minutes. Don't burn it. It does not smell nice and it's not fun to clean the pan.

Add the honey mixture to the granola mixture and mix thoroughly.

Stir in the chocolate chips.

Line a 9"x13" pan with plastic wrap, and press the granola mixture into the pan.

Refrigerate for 2 hours.

Lift the granola bars out by the plastic wrap and cut into squares or rectangles.

Enjoy!

**NOTE: I use all natural peanut butter and almond butter, meaning all it contains is mashed nuts and salt. Peanut butters such as Jiffy or Skippy have added oil, which may affect the way the granola bars hold together. It may be okay, but I haven't tried it.

Tuesday, May 24, 2011

Buttered Rosemary Rolls

Today I have for you the best rolls you will ever make. My friend Leanne sent me a link to these just before Easter. I made them...and then made them twice more that week. They are that good.

Pioneer Woman is a genius. These rolls have it all. There's the bread (awesome texture). Then butter. Fresh rosemary. Coarse sea salt. All in a cast iron skillet.

And I learned two new things. First, I have been seriously missing out in having never used fresh rosemary. It smells divine and has a spectacular flavor.

Second. Scalding milk. In the past I have ran away from any recipe that required scalding milk...I was never quite sure what the right-before-boiling-point was. But it turns out it's not so bad.

To scald milk:
- heat it in a heavy bottomed pan over medium-low heat
- keep a-stirrin' so it doesn't form a skin
- and watch for it to steam AND form small bubbles around the edges (I've also seen the temperature 185 degrees thrown around, if you have a candy thermometer)
- if you do accidentally boil it, you should probably throw it out and start over. Supposedly, it can make the bread taste bad.

One more thing. You don't have to use a cast iron skillet to bake these babies. I fit as many as I can in my skillets, and then just use a glass baking dish.

Buttered Rosemary Rolls

Ingredients:

2 cups whole milk
1/2 cup canola oil
1/2 cup sugar
2 1/4 tsp active dry yeast
4 cups (plus 1/2 extra cup, separated) white wheat flour*
1/2 tsp (heaping) baking powder
1/2 tsp (scant) baking soda
1/2 TB (heaping) kosher salt
melted butter
fresh chopped rosemary
course sea salt

*If you use all wheat flour, throw 2 TB vital wheat gluten in the bottom of one of the cups, then fill it the rest of the way with flour. Half wheat flour/half white flour works great, and of course you can always do all all-purpose flour.


Directions:

Mix the milk, vegetable oil and sugar in a pan.

Scald the mixture (see scalding instructions above). Turn off heat and leave to cool 45 minutes to 1 hour.

When the mixture is lukewarm, but NOT hot, sprinkle in yeast. Let it sit for a minute and then add 4 cups of flour (and gluten).

Stir it up, cover and let rise for at least an hour.

After rising, stir in 1/2 more cup of flour, the baking powder, baking soda and salt. (Pioneer Woman says: At this point, you could cover the dough and put it in the fridge until you need it – overnight or even a day or two, if necessary. Just keep your eye on it and if it starts to overflow out of the pan, just punch it down).

Spray a small iron skillet (or glass baking dish) with cooking spray. Form small rolls and place in the skillet. Cover with a clean towel and let them rise 20-30 minutes. (I get about six rolls in my 9" skillet, 8 rolls in my 12" skillet).

After rising, liberally brush rolls with melted butter and sprinkle on chopped rosemary and coarse sea salt.

Bake in a preheated 375 degree oven for 15-20 minutes. The rolls should be a nice golden brown.

I believe I got 12-14 rolls from this recipe.

Adapted from:

Pioneer Woman Buttered Rosemary Rolls

Pioneer Woman Cinnamon Rolls

Thursday, May 19, 2011

Veggie Burgers

I've been trying my make a decent bean burger. I love the taste of America's Test Kitchen Chipotle Bean Burger, but the burgers always turned out crumbly and were difficult to cook without ending up with scrambled bean burgers rather than patties.

Then I came across Divine Dinner Party's veggie burger recipe, and it seemed like it would be worth a try. And I'm so glad I tried it. It made a beautiful patty, and cooked up like a dream. Tasty too!

I added my own variations to the original recipe. I used black beans rather than pinto, and added a healthy dose of chopped chipotle peppers. It made the burgers a bit too spicy for the girls, but they had the perfect kick for me.

Served on homemade hamburger buns made them fabulous.

Now to see if they hold up frozen and reheated...

Veggie Burgers


Ingredients:
1 can black beans, drained and rinsed (1 1/2 cups black beans if you cook your own)
1-2 cups rolled oats (as needed)
1/2 cup all-purpose flour
1 egg, beaten
1/2 cup mushrooms, finely chopped
1/2 cup onions finely chopped
2 carrots, shredded
1/2 cup red bell pepper, chopped
3 cloves minced garlic
1 TB Worcestershire sauce
1/2 tsp salt
1-2 TB chopped chipotle pepper in adobo sauce

Directions:

Throw all ingredients (start with only one cup of oatmeal) in food processor.

Pulse until coarsely chopped. Add more oatmeal as needed until the patties hold together well.

Chill mixture for about an hour, then shape into smallish patties (these are rich and filling, so don't make them too big).

Chill patties several hours (I was short on time, chilling for just an hour was fine), or freeze and save until needed.

Two ways to cook:

1) Broil patties 4-6 inches from heat about 10-15 minutes, until browned and heated throughout. This works well if your patties want to fall apart.

-OR-

2) Saute them in a skillet in a bit of olive oil. Cook patties over medium-high heat for about 6 minutes a side, until crisp outside and cooked through.

The original recipe says you can pre-cook the burgers, then re-heat on the grill. I'm wondering if I can pre-cook the burgers, freeze, and then re-heat on the grill, straight from the freezer.

Serve on hamburger buns with melted pepperjack cheese, sauteed onions, lettuce, avocado and tomato. I always add a pinch of salt and pepper to the top of my tomato slice...never can you have too much salt.

They are irresistible.

Wednesday, May 18, 2011

Homemade Hamburger Buns

About a year ago, I came across the idea of homemade hamburger buns. My first thought was , "No kidding? You can make hamburger buns?"

Well, someone can make hamburger buns. But that someone wasn't me. Not for lack of trying. All the recipes that exclaimed, "You'll never need another recipe for hamburger buns!" never quite worked out for me.

Until now.

I was browsing the gourmet burger section of a blog, and there was a link to a burger bun recipe. It was quick and easy and I also wanted to try their veggie burger recipe, so I thought I might as well give it a try.

They turned out great! I swapped out the white flour for white wheat and a bit of vital wheat gluten. And an added bonus, they were much faster than most of the burger bun recipes I have tried.

And another bonus...the veggie burgers turned out great too.

Homemade Hamburger Buns

Ingredients:
2 TB active dry yeast
1 cup plus 2 TB warm water
1/3 cup vegetable oil
1/4 cup sugar
1 large egg
1 tsp kosher salt
3 1/2 cups (or less) white wheat flour
2 TB vital wheat gluten

Instructions:

Pour warm water into a large mixing bowl and sprinkle yeast on top.

Gently stir in oil and sugar. Let stand 5 minutes to activate yeast.

Add the egg and salt. Add the vital wheat gluten and enough flour to make a nice, soft dough - start with 3 cups, and add more a tablespoon at a time. I used less than the 3 1/2 cups called for.

On a floured surface, knead dough until it begins to feel smooth and elastic, about three to five minutes.

Immediately divide the dough into eight pieces, and shape each into a ball.

Place dough balls on greased baking sheets, leaving plenty of room for them to expand.

Cover dough with a clean towel and let rise about 10 minutes in a warm place.

Bake rolls in a preheated, 425 degree oven for 10-12 minutes, until golden.

Cool on racks and serve with your favorite hamburger or veggie burger.

*Adapted from Divine Dinner Party*

Tuesday, May 17, 2011

Lemon Poppy Seed Muffins

Sunday started out okay, despite the return of gloomy, cold weather. It deteriorated fast. By 10:30 am, everyone (including me) had been sent to their rooms to regroup. Kitty immediately fell asleep, Boo found consolation in Angry Birds, and I pulled the covers over my head. J suggested a cheerful brunch to start the day over, so I headed over to two of my favorite food blogs and we decided on Lemon Poppy Seed Muffins from Annie's Eats and a German Pancake from Two Peas and Their Pod.

Both recipes were perfect, and the day brightened from there.

I adjusted the muffin recipe a bit to incorporate a bit more fresh lemon juice. The muffins were moist and had a bright flavor that I loved. Boo loved them too. She was left alone with the leftover muffins right before bed and eight mini muffins mysteriously disappeared....

Lemon Poppy Seed Muffins


Ingredients:

For the muffins:
2 cups all-purpose flour
2 TB poppy seeds
1¼ tsp baking powder
¼ tsp baking soda
½ tsp salt
8 TB unsalted butter, softened
1 cup sugar
2 large eggs
Zest of 1 lemon
1-2 TB fresh lemon juice
1 tsp vanilla extract
1 cup plain yogurt

For the glaze:
½ cup confectioners’ sugar
1-2 TB fresh lemon juice

Directions:


Combine the flour, poppy seeds, baking powder, baking soda and salt in a medium bowl.

In a mixing bowl, beat together the butter and sugar on medium-high speed until light and fluffy, about 2 minutes.

Beat in the eggs one at a time, blending well after each addition.

Mix in the lemon zest, lemon juice, and vanilla extract.

With the mixer on low speed, mix in half the dry ingredients, then the yogurt, then the remainder of the dry ingredients, beating each addition just until incorporated.

Divide the batter into muffin liners.

Bake at 350 degrees for 10 minutes for mini muffins, 16-18 minutes for regular muffins. Test muffins with a toothpick, let cool for 5 minutes in the pan, then transfer to a wire rack to cool completely.

To make the glaze:
Whisk together the confectioners’ sugar and lemon juice in a small bowl. Drizzle glaze over each muffin while they are still warm. I did mini muffins and had more than enough glaze...they each got a generous glazing.

Monday, May 16, 2011

DIY Compost Bin

And now the moment you've all been waiting for...

...because I'm sure you all have been thinking through the long, cold winter about making your very own compost bin, just like I have.

And now the weather is perfect, so here's your chance.

I found these instructions and these to be very helpful.

Find a big plastic storage bin with a lid. Mine was a little dusty, so I cleaned it up a little. You know so it would be clean for all the composting.

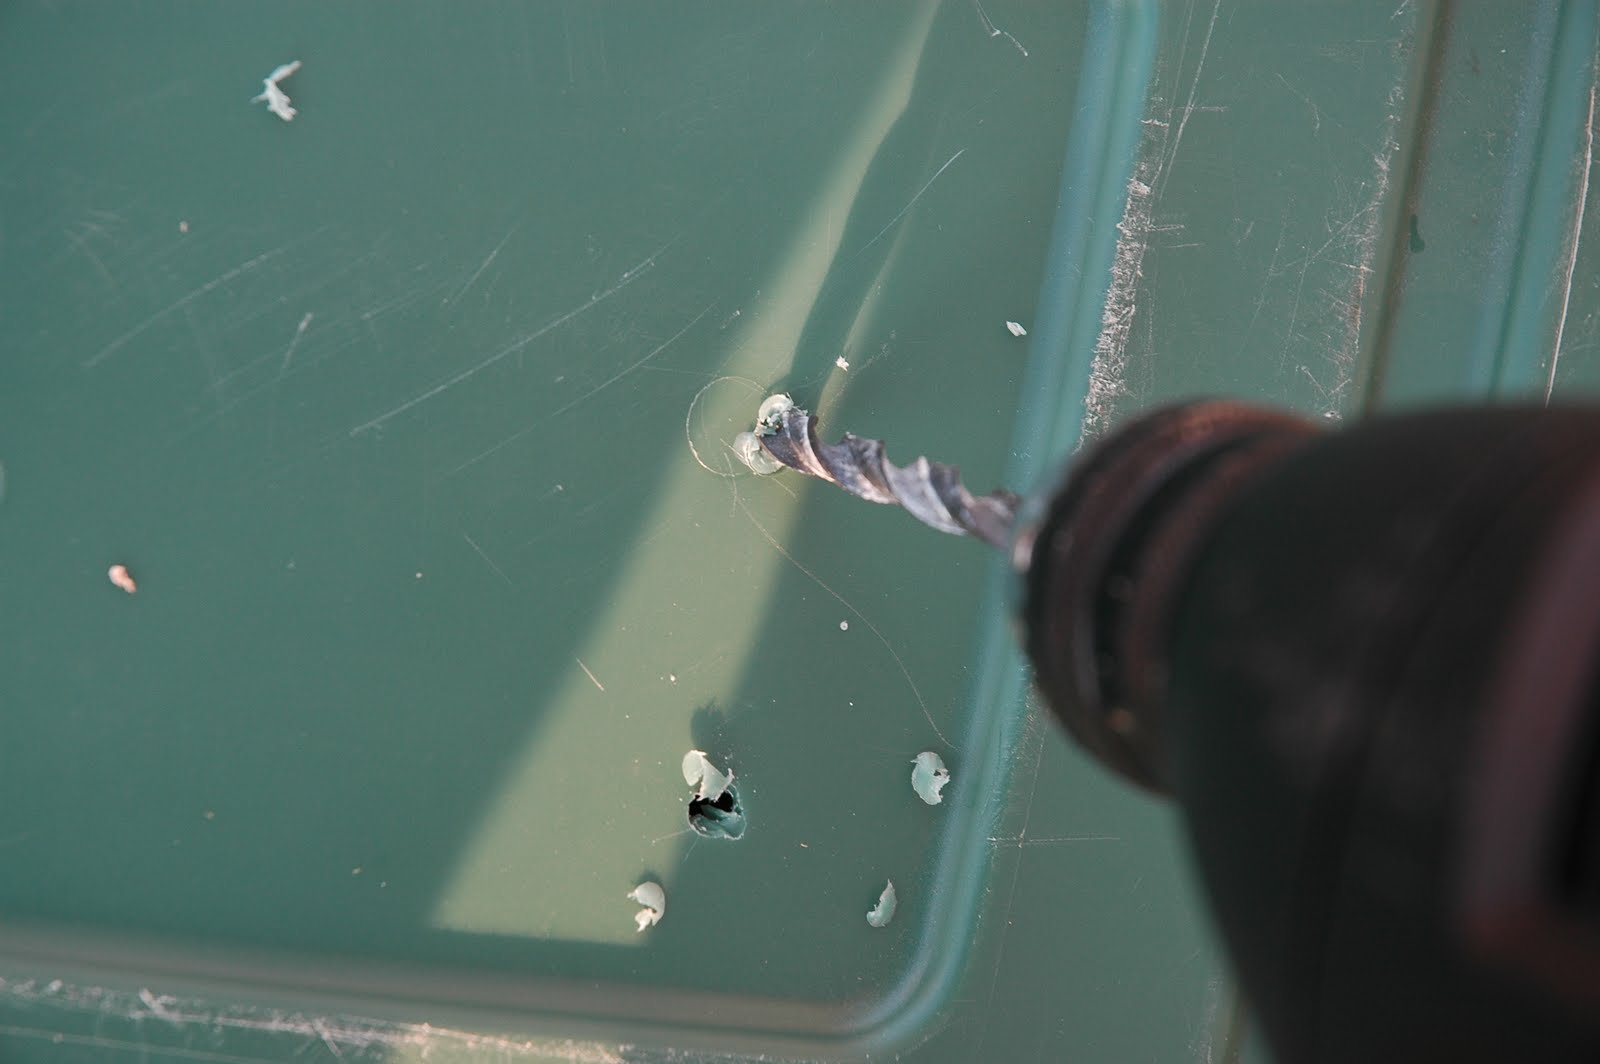
Drill holes in the bottom, sides, and lid. You want air circulation. So they say.


Put some shredded newspaper on the bottom of the compost bin and then add some dirt from your garden until your bin is 1/3 to 1/2 full.

Now put the lid on and find a nice spot (shady, so your compost doesn't dry out) for your compost bin.

Don't compost things like meat, dairy, oils, lime and colored paper. Here's a nice list of things to avoid composting.


Great project. And even I finished it in one day. Okay, well one 24 hour period.

Sunday, May 15, 2011

Sara's baby shower


Sara's having a baby! And it's a girl - I love girls.


Since we all live in different states, and it's rare indeed that we all are together, we decided to have a baby shower for Sara the day before Em's wedding.


We were still missing a few of our girls (and we did miss you), but most of us were there...


Mom was nice enough to let me do the food, so I spent the morning making a horrendous mess in her kitchen (which J and Peter O. cleaned up for me, thanks boys). But out of the chaos came a lovely spread...

I really regret not getting individual pictures of the food, but considering everything that was going on, I'm glad I at least snapped this one.

Leigh-Ann made the fruit kabob bouquet, and it was the most gorgeous dish on the table.

I don't want to tell you what you should do, but...you should run to the store and buy the ingredients for the ham and cheese sliders. I've looked at them a number of times on Annie's Eats, but had my doubts about the mustard sauce on top. When my food friend at Apron Appeal gave them a glowing review, I decided it was time to try them. They were so. good. I used Rhodes frozen dough for the slider roll, easy and yummy.

Saturday, May 14, 2011

Tilapia with Cilantro Butter

Here's the thing. I don't like fish. I don't like to eat fish and I don't especially care to look at fish in aquariums either.

But I married a fish-lover.

So I'm learning to cook fish and trying to like it. It's an uphill battle.

I know that breading and frying makes just about anything palatable.

And I've found that tilapia is not so bad. I keep a bag of frozen fillets in the freezer, so I decided to give Tilapia with Cilantro Butter a try.

Who would ever have thought that I would go back for seconds, exclaim that I love fish, and be excited to make it again?

The sauce was incredibly tasty. The blend of cilantro, butter and lemon was a perfect combination.

And as a bonus, it's quick and easy.

Try it. You'll like it.

Tilapia with Cilantro Butter

Ingredients:

For the fish:
1/4 teaspoon
salt
1/4 teaspoon
ground cumin
1/8 teaspoon
ground red pepper
4
(6-ounce) tilapia fillets
Cooking spray

1
lemon, quartered

For the sauce:
4 tablespoons
butter, softened
4 tablespoons
finely chopped fresh cilantro
1/2 teaspoon
grated lemon rind
1/2 teaspoon
paprika
1/4 teaspoon
salt

Directions:
Mix the salt, cumin and red pepper together and sprinkle over both sides of fish.

Heat a large skillet over medium-high heat.

Spray the pan and both sides of fish with cooking spray.

Cook the fish about 3 minutes on each side or until fish flakes easily with a fork. Transfer the fish to a platter and squeeze the lemon quarters over the fish.

Stir together the sauce ingredients and serve with the fish.

Thursday, May 12, 2011

What is that bright thing in the sky?

I mentioned in my last post that it was sunny in California. For three days in a row. I don't think we've seen that since October. Not only sunny, but 88 degrees!

The girls got to Grandma's house, and
ran to the pool in the backyard with Tyler.
Did it matter that it was really only big enough for one? Of course not.


I hardly saw Boo for the first two days, she was so busy playing with Ty and Lucy. They played freeze tag, Duck Duck Goose, and generally ran wild.

Kitty ran with the kids a bit. She was delighted to spend the days outside and spent a significant amount of time walking the stones lining the garden.